
How to make a successful underwater photograph of a backlight scene?

Learn how to manage backlighting in underwater photography !
In general, backlighted photos are technically more difficult to take than environmental pictures with only the deep blue of the water column. This difficulty is due to the great dynamism of the scene.
This is all the more true if the sun is present in the composition you have chosen.
Highlighting the sun
If you decide to integrate the sun into your composition, it must be put forward and valued at its true value!! So that this star is no longer a disaster, because no matter how magnificent it may be, it has suffered too much from bad exposure, an unsightly halo to its contour, or simply bad post-treatment!!
It’s time to fix this, so that the sun will never again be sacrificed to your foreground.

Avoid total improvisation
A backlight photograph can’t be improvised.
Unlike a photo taken on the go , you have to think about it:
- The composition
- The placement of the sun in relation to the foreground
- The different settings (exposure triangles : aperture, shutter speed, iso).
Indeed, I consider the sun as a subject in its own , which must be treated as such. This means that you must attach as much importance to your foreground as to the sun. Personally, even if I have an amazing foreground , perfectly composed and exposed very well , I will consider it as “lost” if I have mismanaged the notion of “sun”. Moreover, the most important concept in backlighting your shot isn’t so much the sun itself, but rather the management of its contour. Indeed, the sun itself will inevitably be overexposed, not to say burned (yes yes it is the sun). The real challenge lies in the transition from sun to blue. A good management of this transition will make your photo a success (at least for the sun).
How to avoid “burning” the sun ?
What EXIFS to have, techniques and tricks to adopt ?
For this we will discuss various topics such as for example:
- the settings of a backlit picture
- the composition
- different possible renderings
- and to finish with the final touch : post-processing tutorial
First of all, I would like to point out the main success factor of a backlit photo: it’s obviously LUCK !!!
Exemple with this shot :
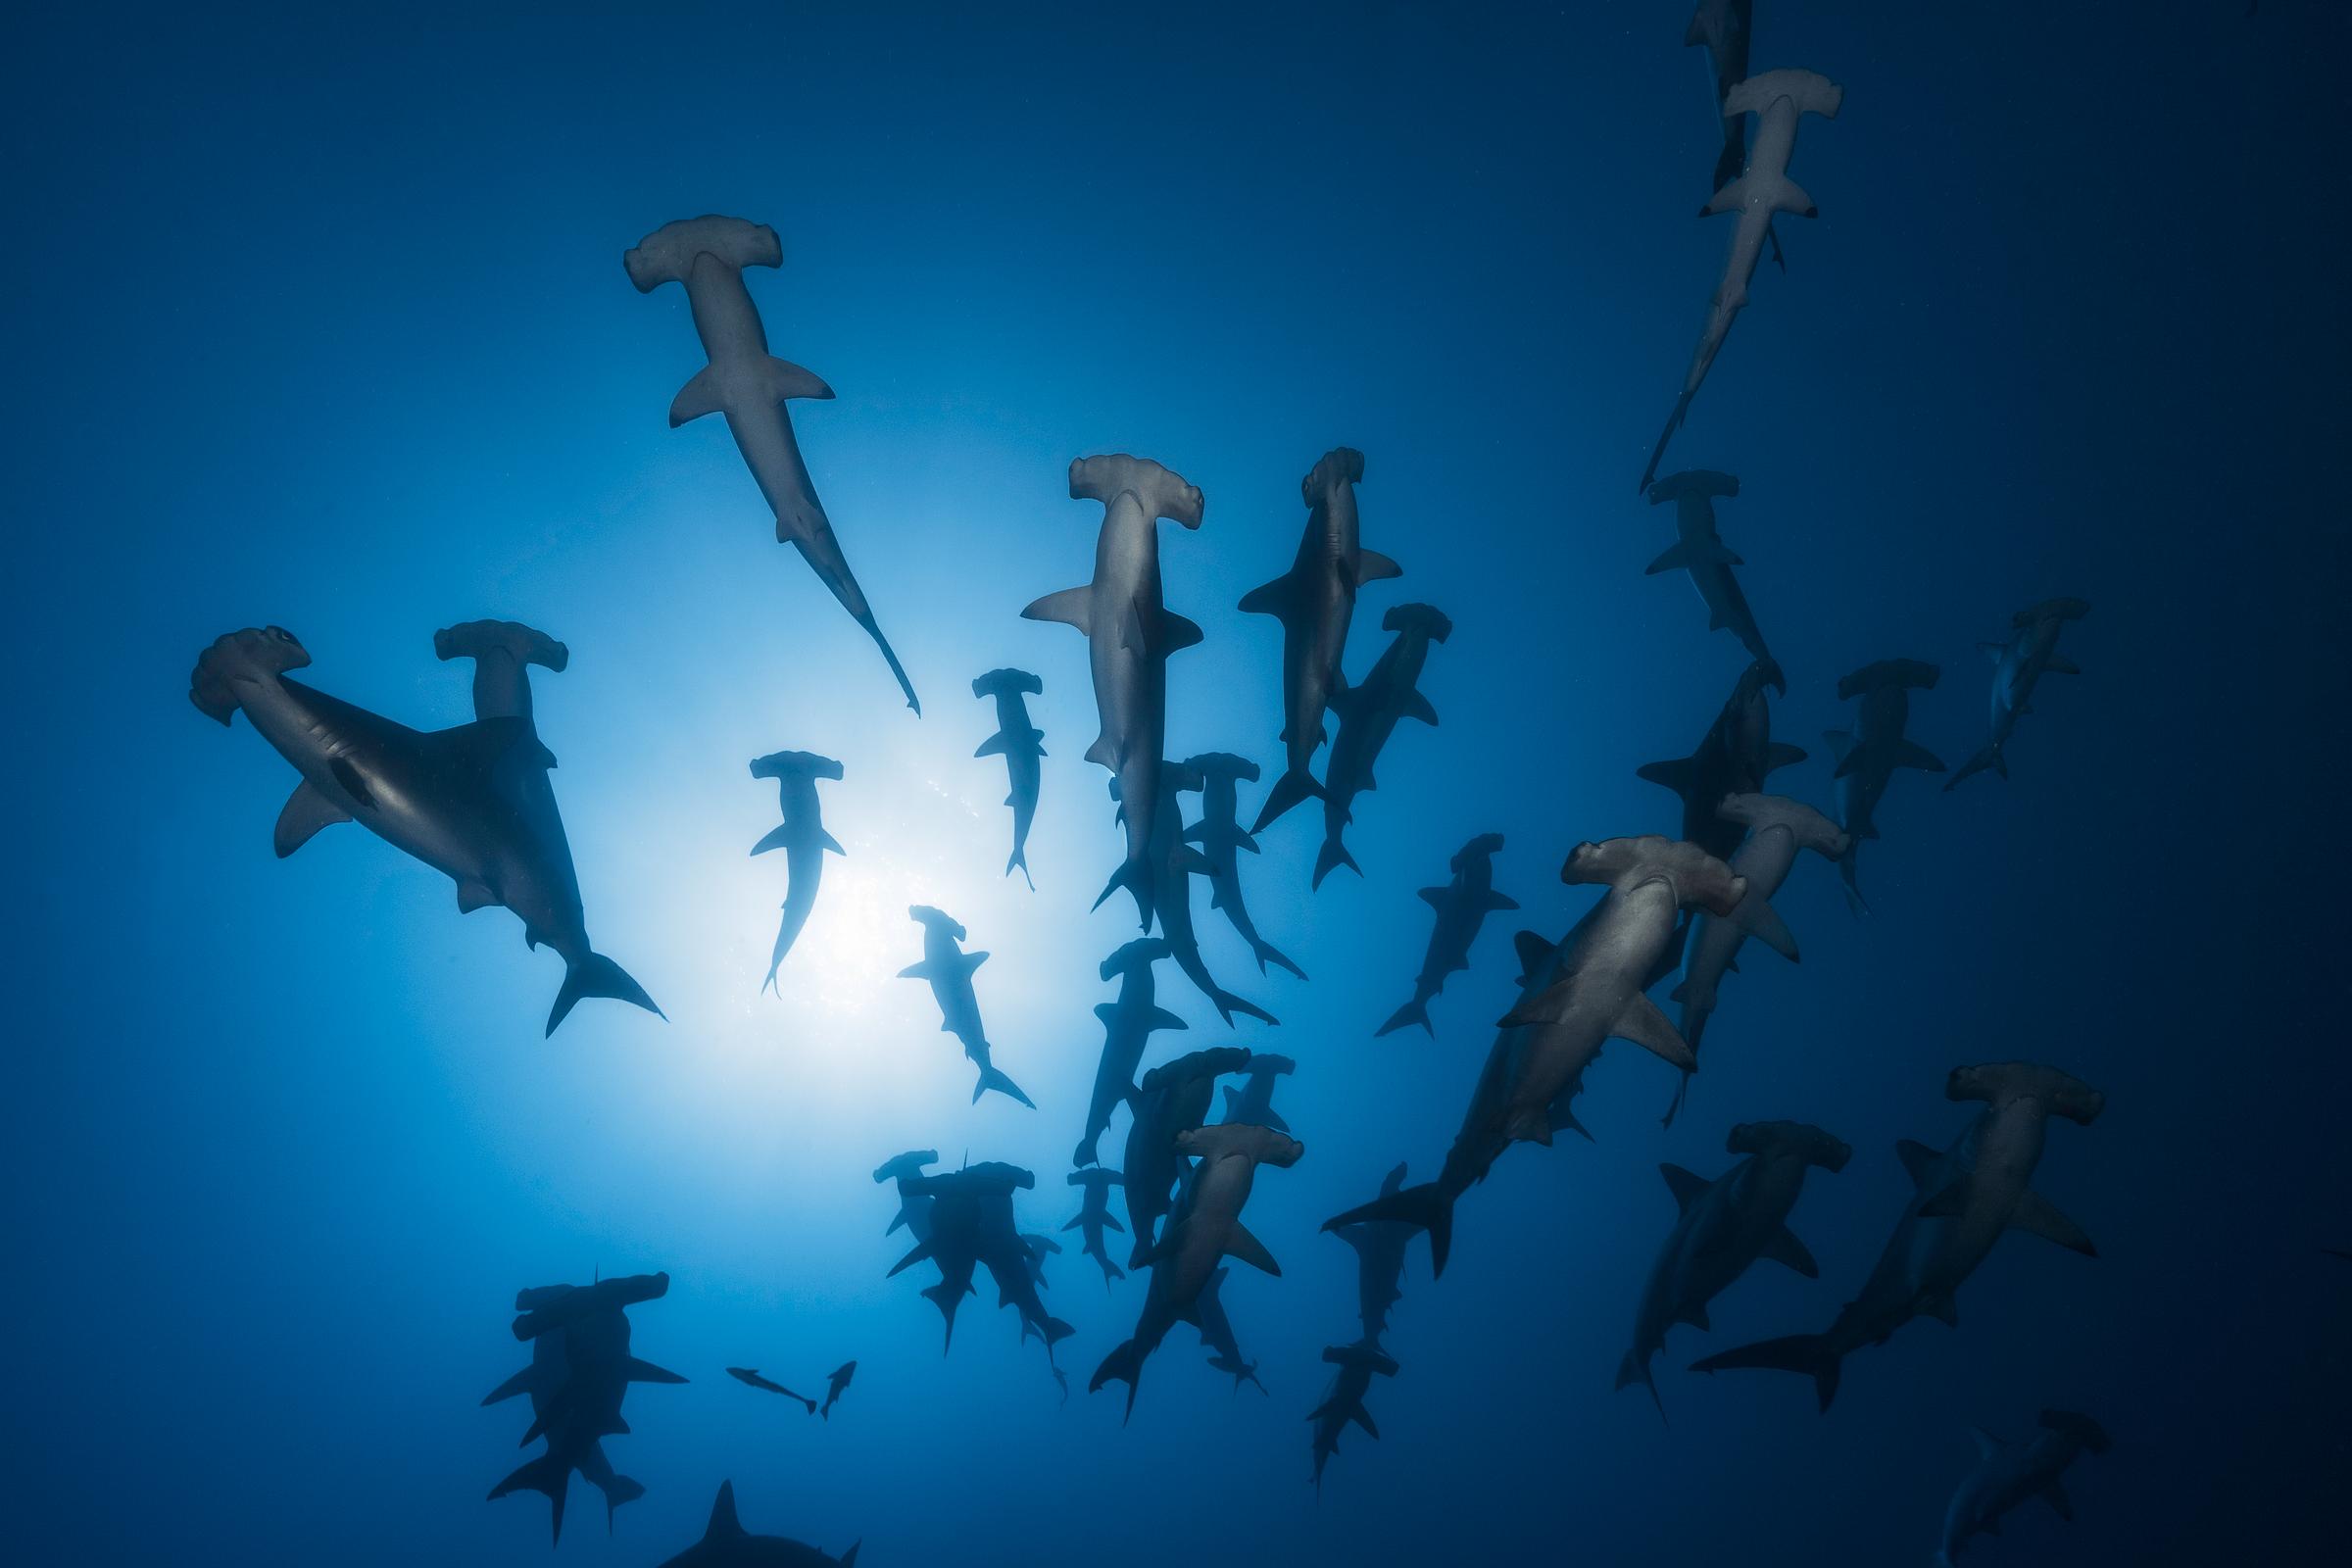
How did I make this picture ?
I was at 35 m deep, quietly photographing this beautiful sun with its magnificent gradient of blue when suddenly…. BIM, a group of a hundred hammerhead sharks came between them and me !!!!! Even though I hadn’t asked for anything! Quite frankly, they’re not short of air.
What, did you believe it?
Noooooo and you are right. It doesn’t work that way!
Luck has nothing to do with this story.
Moreover, very often luck doesn’t have much room in photography , and even less so with backlighting. And it’s quite the opposite. Anticipation is decisive!! On immobile subjects, we have time to see things coming, settle down and fine-tune our settings. But on mobile subjects, like in open water with pelagic animals for example, it’s a different story altogether. As is often the case with exploratory diving, while waiting for a subject to reach your flashes, the basic settings of your camera are made for exposure of a subject in blue. That is to say, with a slightly underexposed background to have a very dense blue.
However, these settings are rarely effective for backlit photos. Obviously, the brightness of the two scenes is very different. That was exactly the case when I took this picture of the hammerhead sharks. We were descending to a target depth of 50m in deep blue.
Suddenly I hear Olivier, my partner, making loud noises. It shows me to our left, at about 30 meters from us and slightly in height, a huge group of hammerhead sharks coming out of the blue and swimming parallel to us.
The photo of the backlight was already imagined without thinking for a long time. While I was palming as fast as possible in their direction, I turned the knurled wheels, typed on the keys of my case and my flashes in order to have the optimal adjustments at the moment when I will pass under the bench, the sun in full in the frame.
Experience and practice are fundamental to progress!!!
Without this anticipation, this photo would never have been possible. This of course is true for other situations.

When shooting, the settings
You can’t miss the right moment .
As much as it’s possible to “save the furniture” with an underexposed photo, as much when it is burned…. Well, it’s burned!!!! Also, the main challenge of a backlit photo is to avoid burning the sun, and especially its contour.
Indeed, the sun itself…. It’s the sun! You can’t look at it without a filter using naked eye. Therefore it’s normal that its brightness is important.
Finally, it all depends on how deep you are. Even with excellent visibility, beyond the 30 meters depth, its brightness and luminosity decrease a lot.
The rays that penetrate the water in the 10-meter zone have not existed for a long time.
This means that the rendering will not be the same depending on visibility and depth.
Let’s get to the settings !
In fact, there are not 50 solutions to avoid burning the area around the sun.
You have to under-expose your shot , quite simply !!!!
I would even say that we should grossely under-expose it … But be careful, not in any way!
And yes, it’s nice to stick the exposure slider completely left, so far to the left that even your camera’s light meter won’t know where it is!
However… it has to be done in the right way.
To properly under-expose a photo, the first thing to do is to lower the sensitivity of the sensor (the iso).
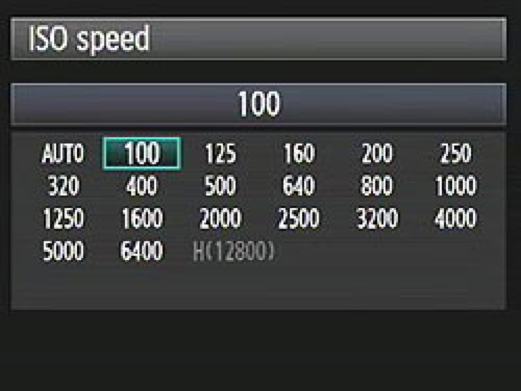
I use a value of between 100 and 200 iso when I am in a depth between the surface and 15 m deep.
- the scene is very bright so the sensor does not need to be very sensitive.
- it will be easier to retrieve information in dark areas without having too much noise (the latest generations of sensors produce almost no noise at these values). Deeper, around 30 meters for example, I can use values such as 250 iso or even 320 iso depending on visibility.
The aperture
The second value you have to take in count is the aperture.

Do not hesitate to close. Personally, I don’t ask myself a question: if I am in 10 to 15 m of bottom in clear water, I close between f16 and f22.
Caution: although the sun should be considered as a subject in its own right, the focus should be on your foreground.
For the shutter speed, it must vary between 1/100 (speed works everywhere) and 1/200. Speed is the last value to be adjusted after sensitivity and aperture.
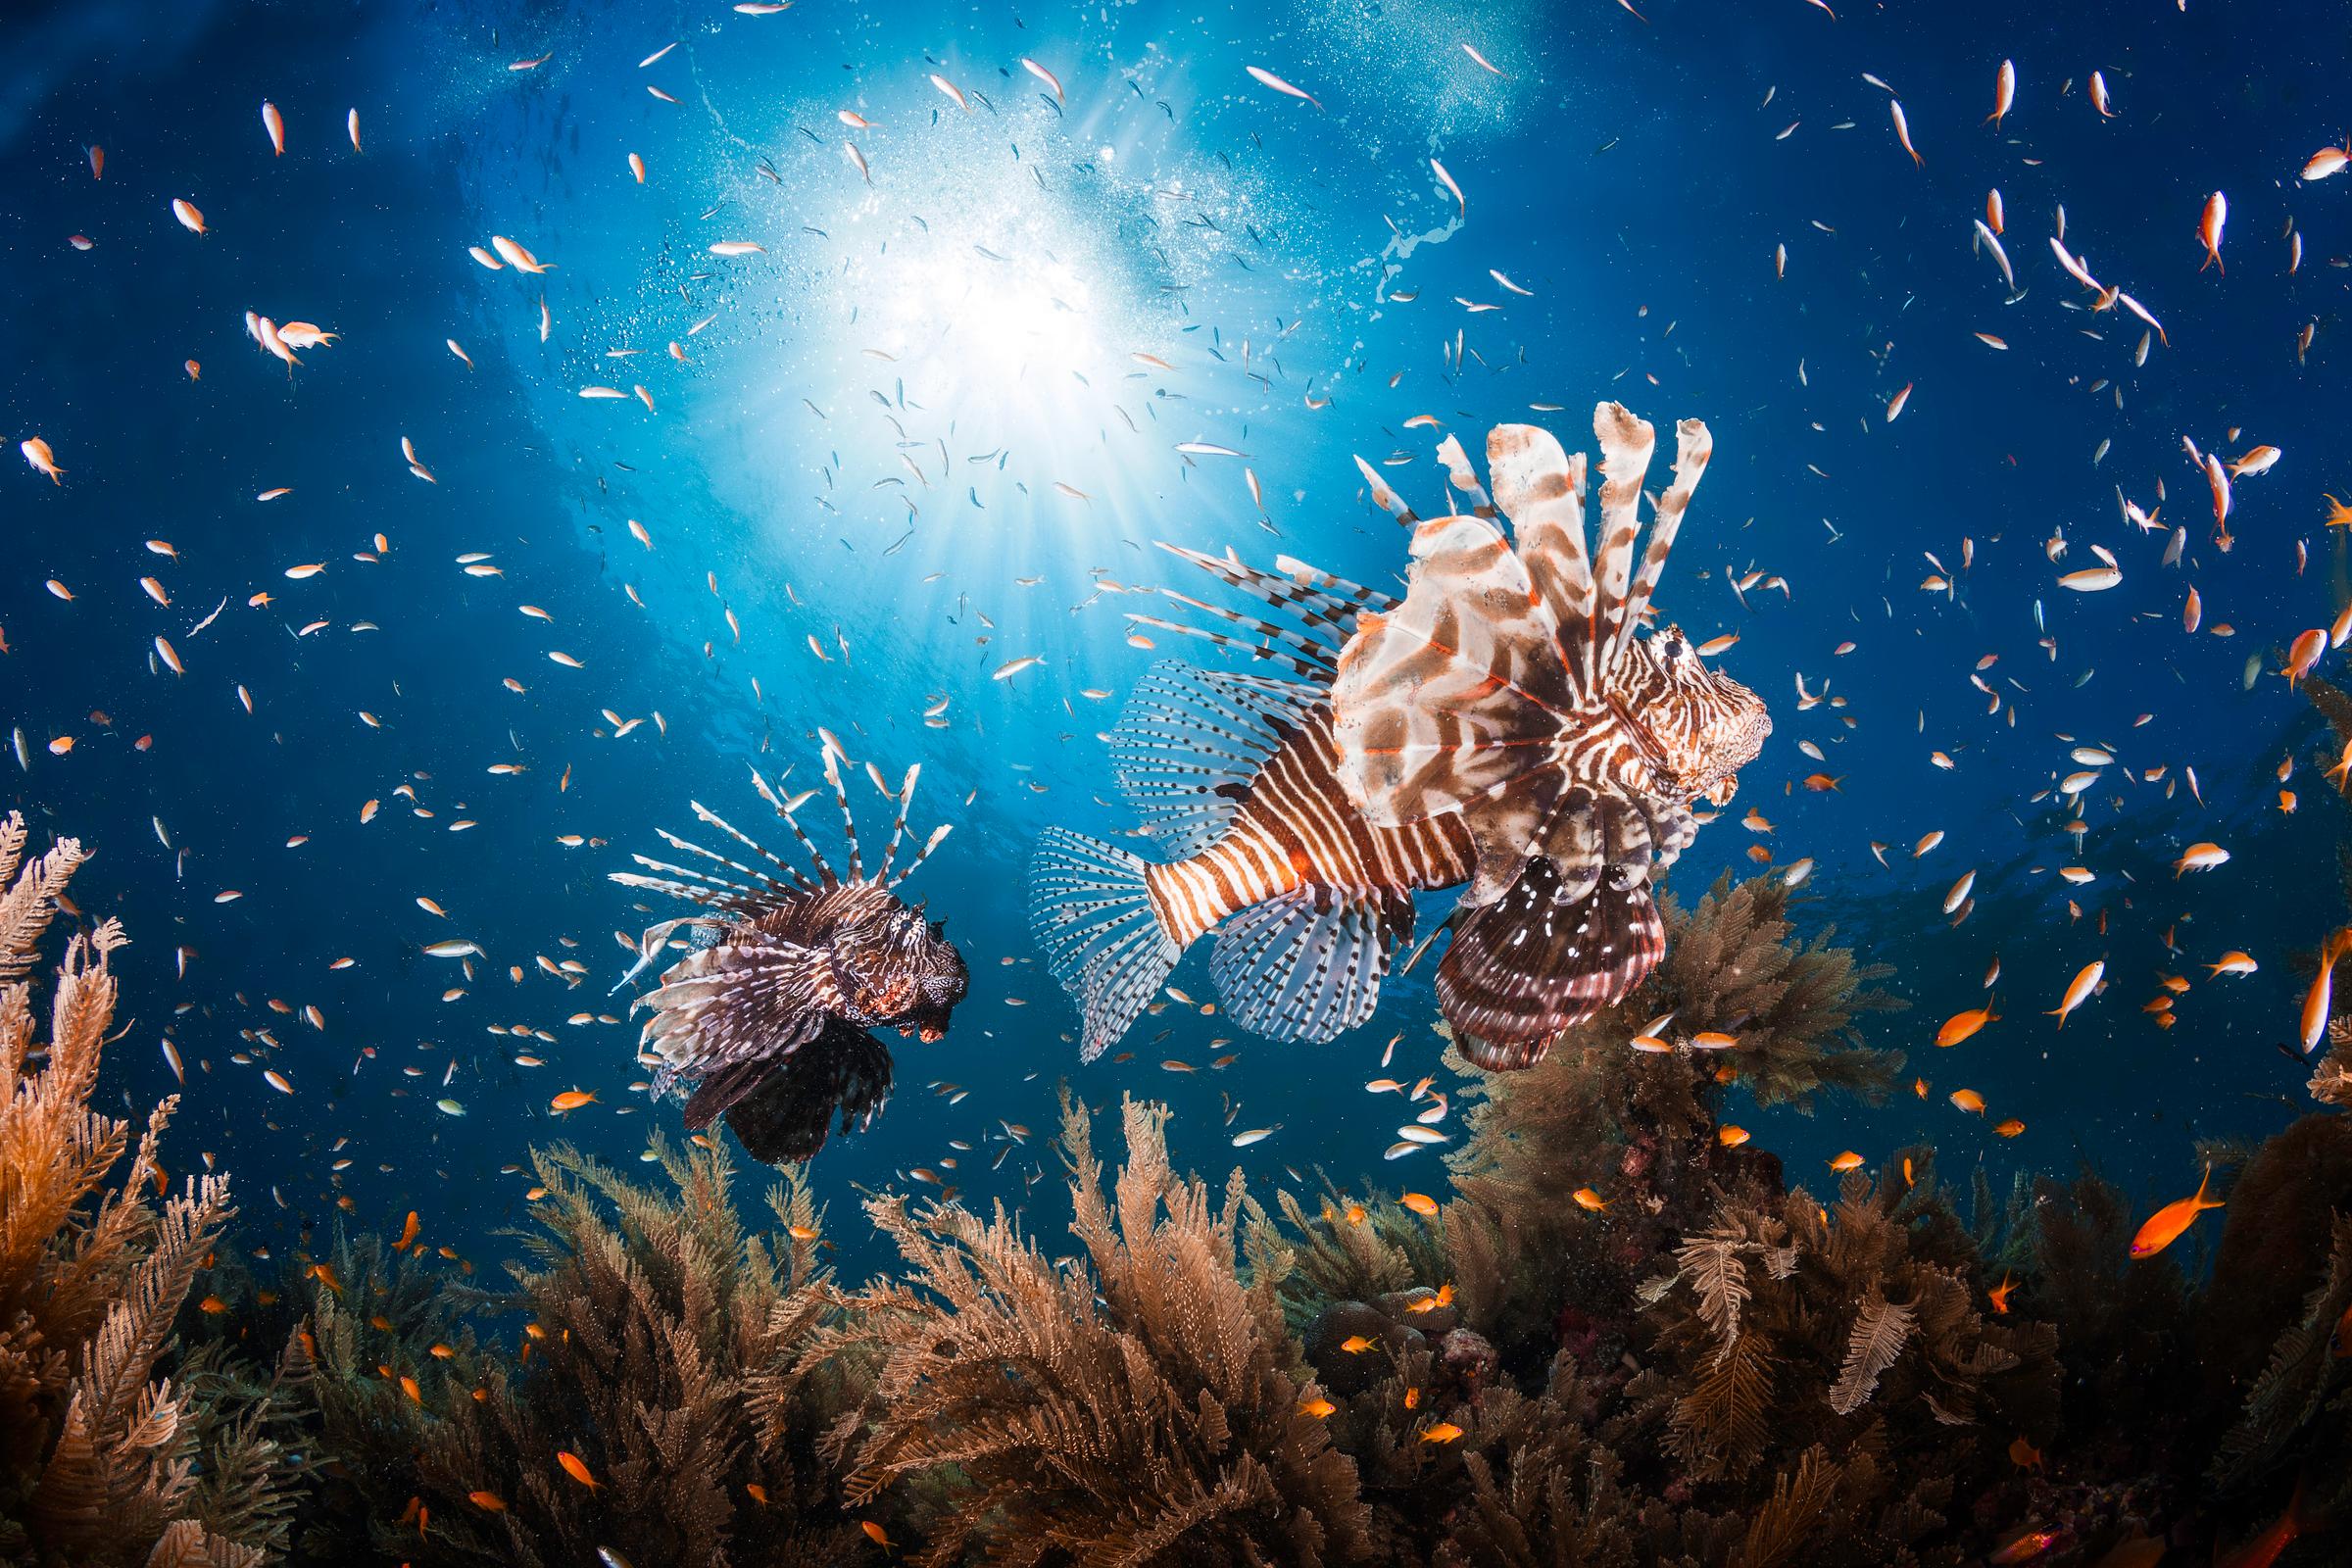
Managing the sun and foreground exposure !
Iso 100; f22;1/100, the exposure slider is completely left.
Even with the sun in the frame, you are under-exposed between -3 IL and -5 IL depending on the conditions.
Without flash, your foreground is completely clogged. Not to say in the complete darkness. So we’re gonna have to bring in some light with the underwater flashes.
This foreground must be properly composed but also well exposed. The dosage of the power of underwater flashes and their orientation will therefore be decisive.
This is one of the biggest challenges of underwater photography in wide angle: knowing how to deal with natural and artificial light.
You will have to find a good balance so that the two sources of light are harmonious, without one of them dominating the other.
The power of flashes will depend on the distance between your first shot and your camera.
- If your subject is very close, almost touching your dome, a power of between ¼ and ½ will suffice. However, special attention must be paid to the positioning of flashes.
- If the subject is a little far away, for example more than a metre away, don’t ask yourself any questions, adjust the flashes to their maximum power (for backlighting, a powerful flash is very appreciable).
The settings I just quoted are valid for a large majority of underwater photos in backlight.
This does not mean that they are suitable for all situations. You will have to adapt to each condition.
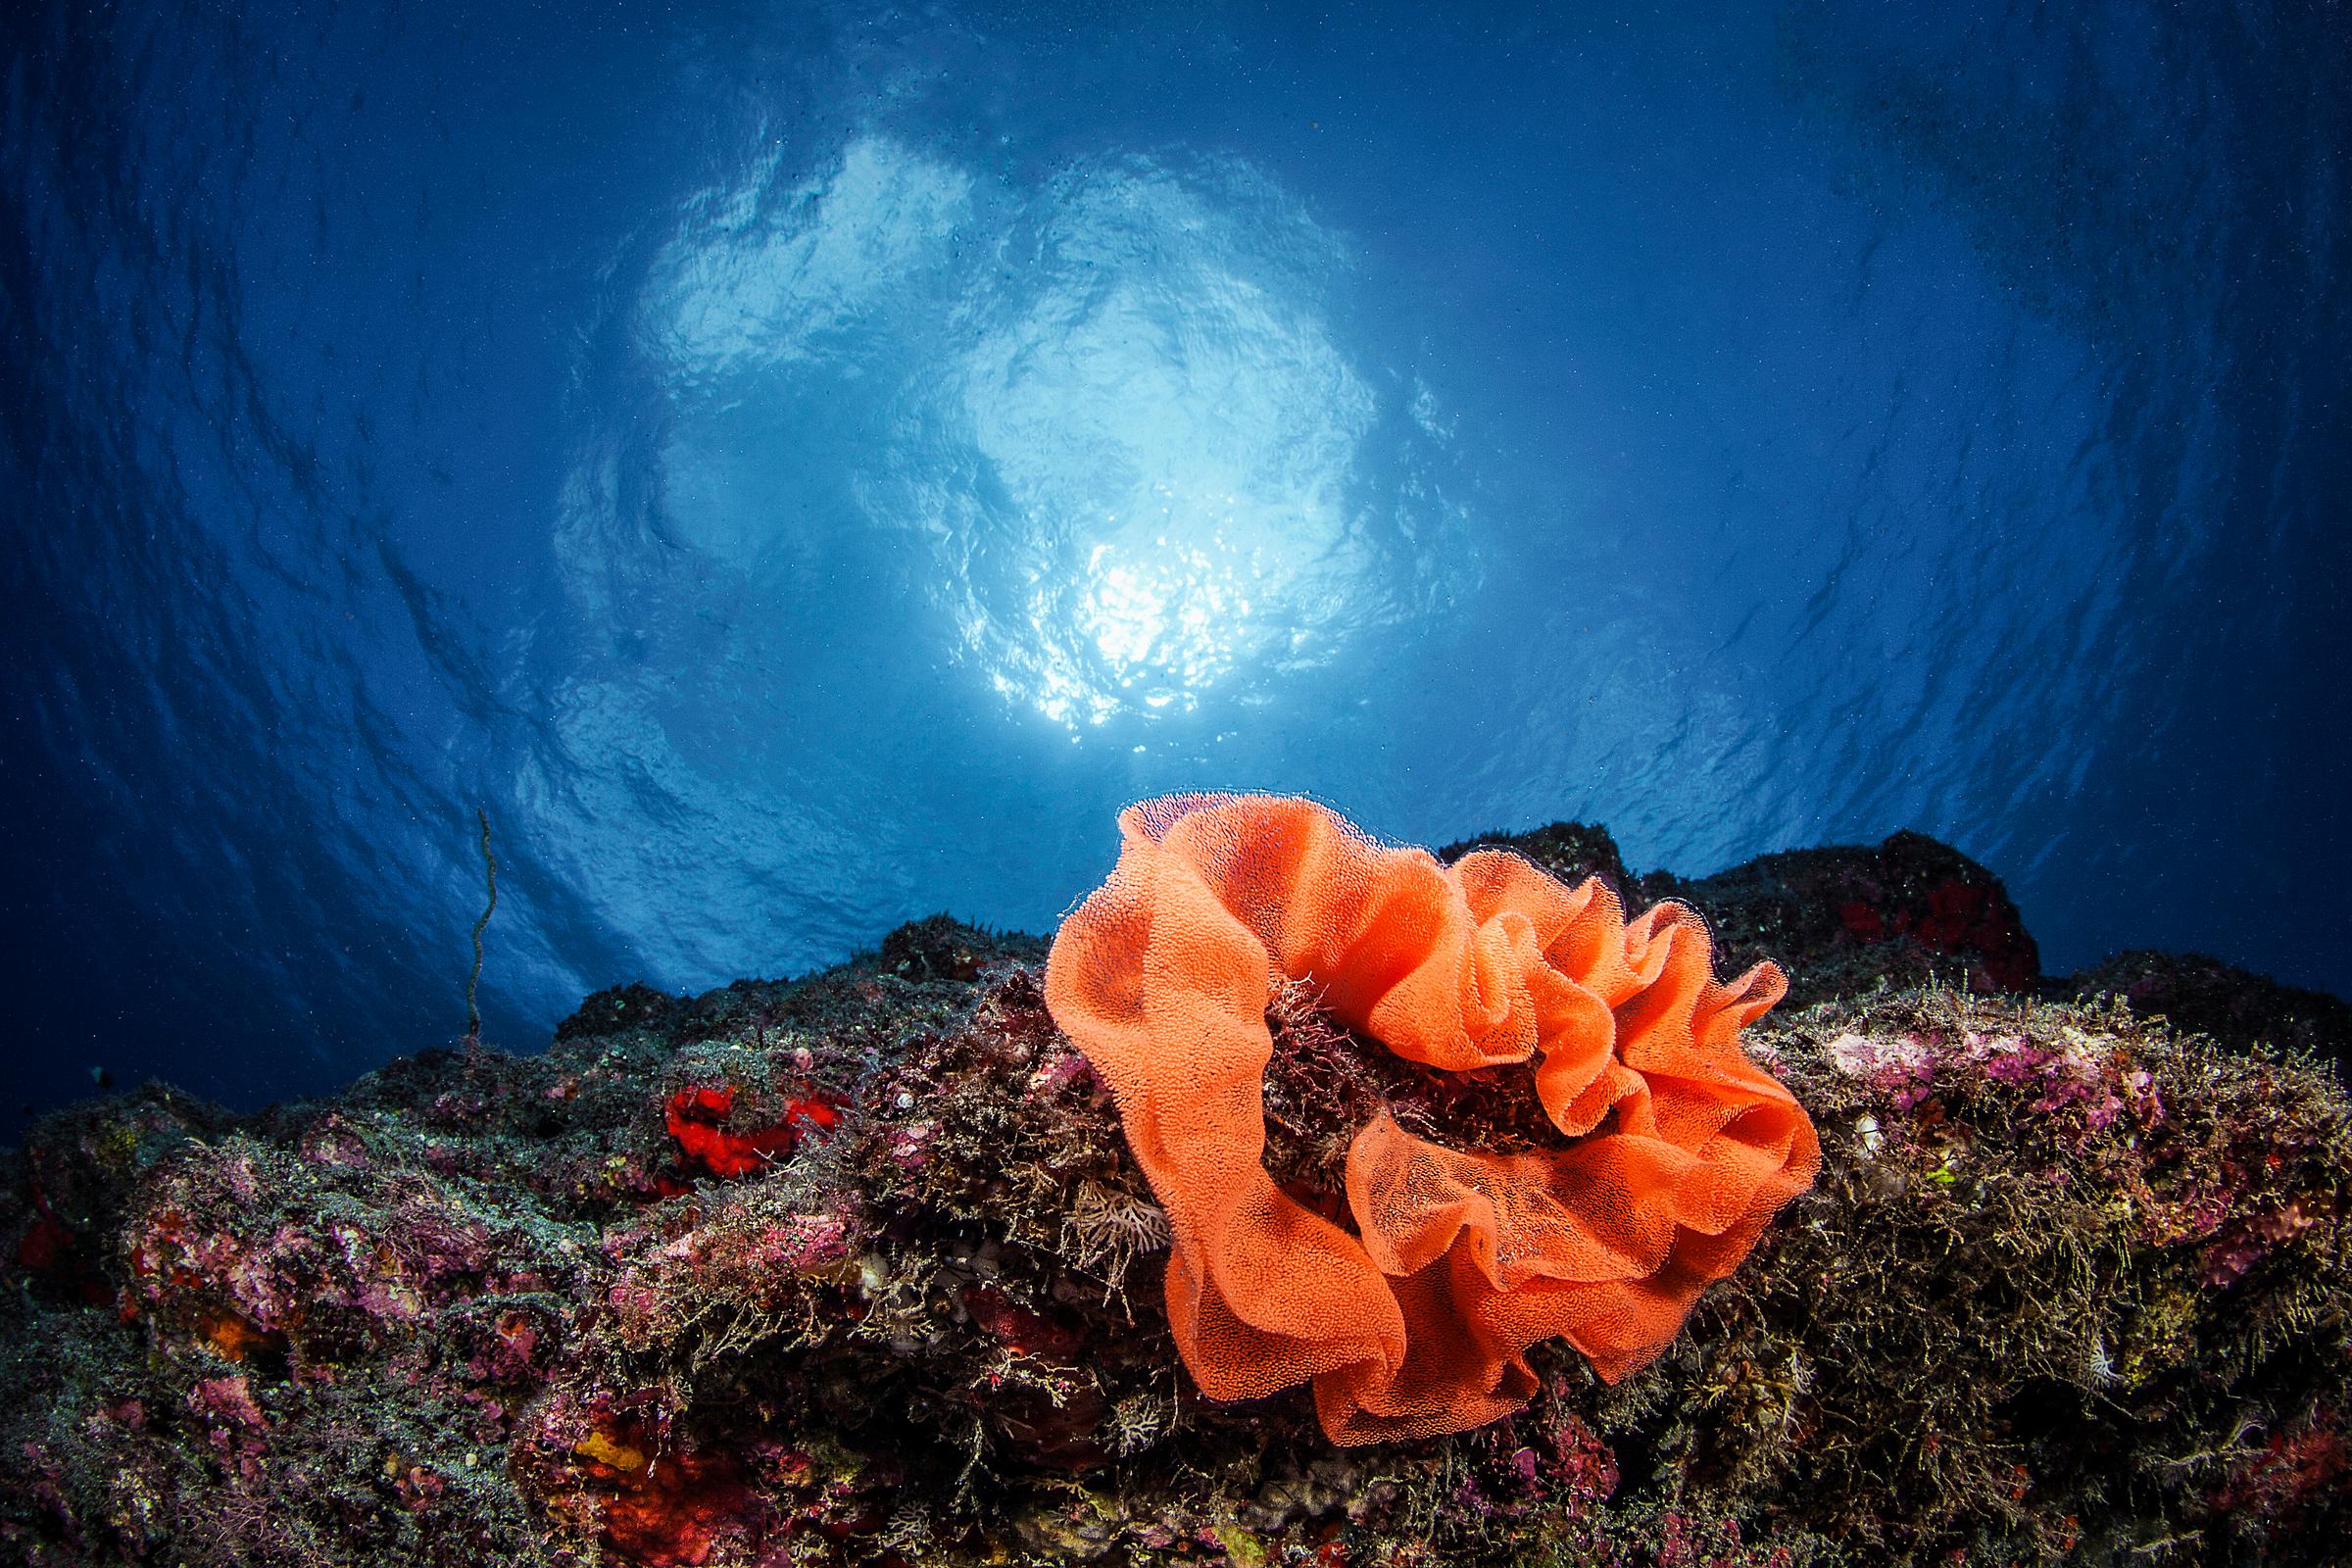
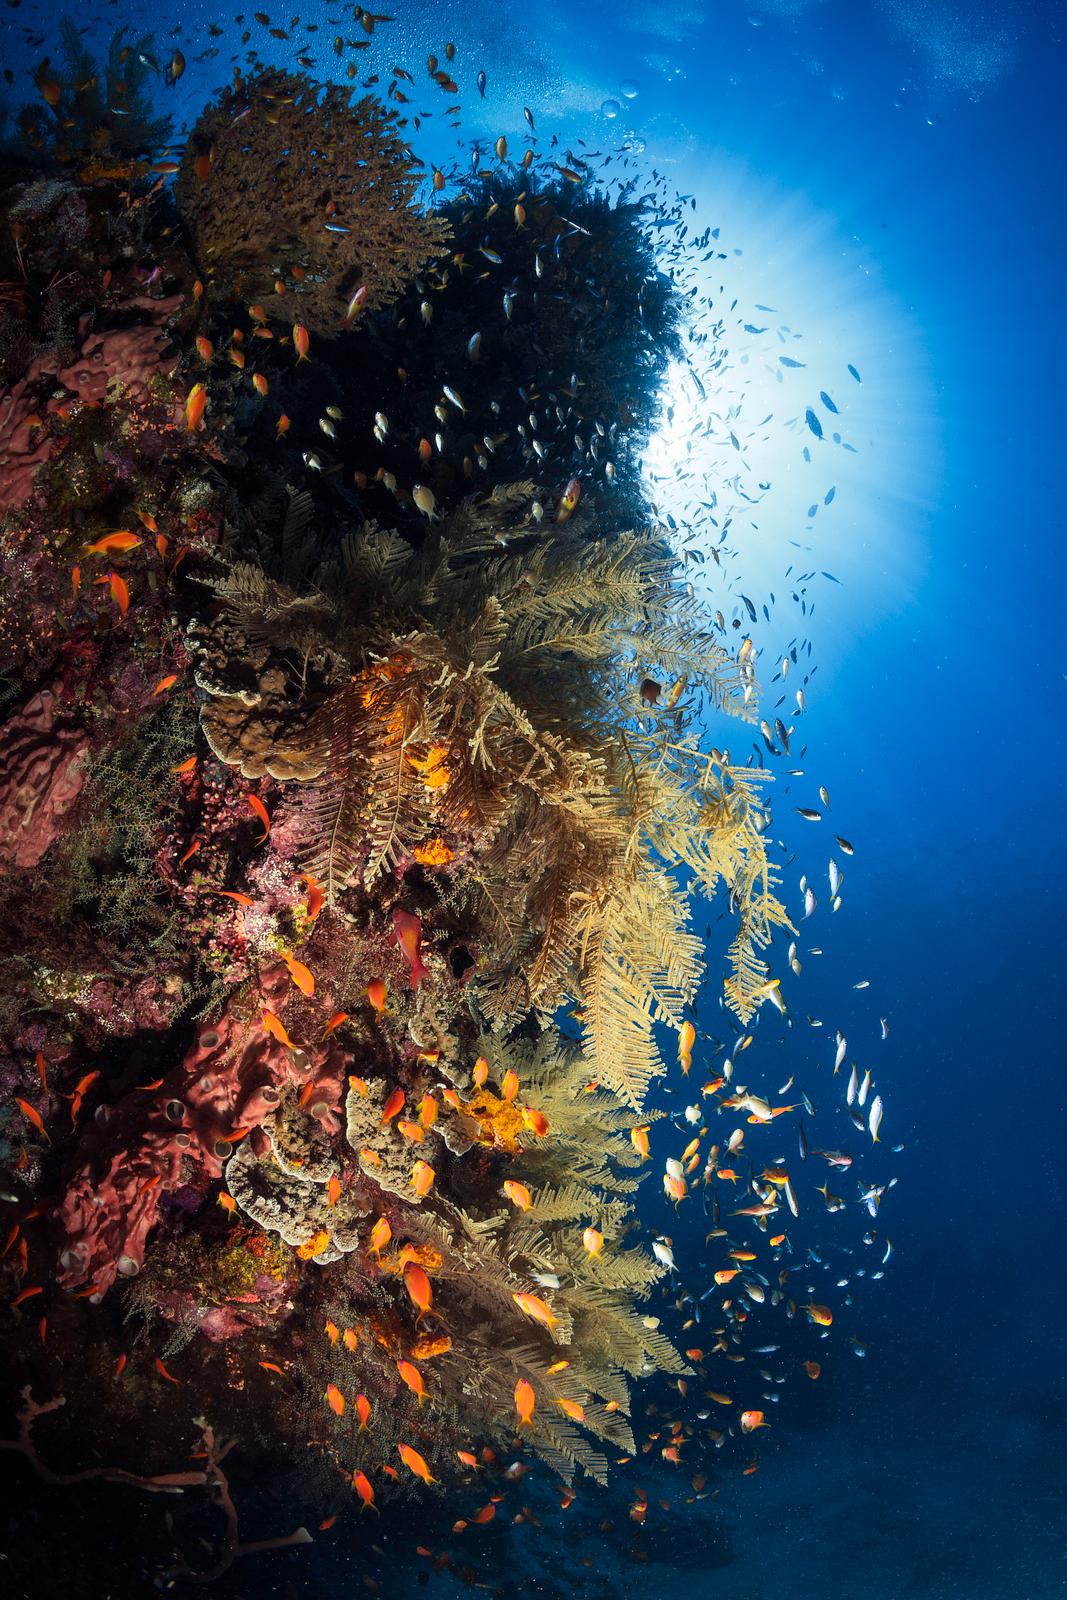
Check out this picture :

The exifs of this cliché are 1/100; f10; iso 250.
I was about 20 meters deep when I took this picture, but the visibility was really very poor. In fact, the atmosphere was dark enough to make it difficult for the sun to penetrate the particle-filled water.
In this case, no need to close the diaphragm more than that. I just modified the iso from 400 to 250.
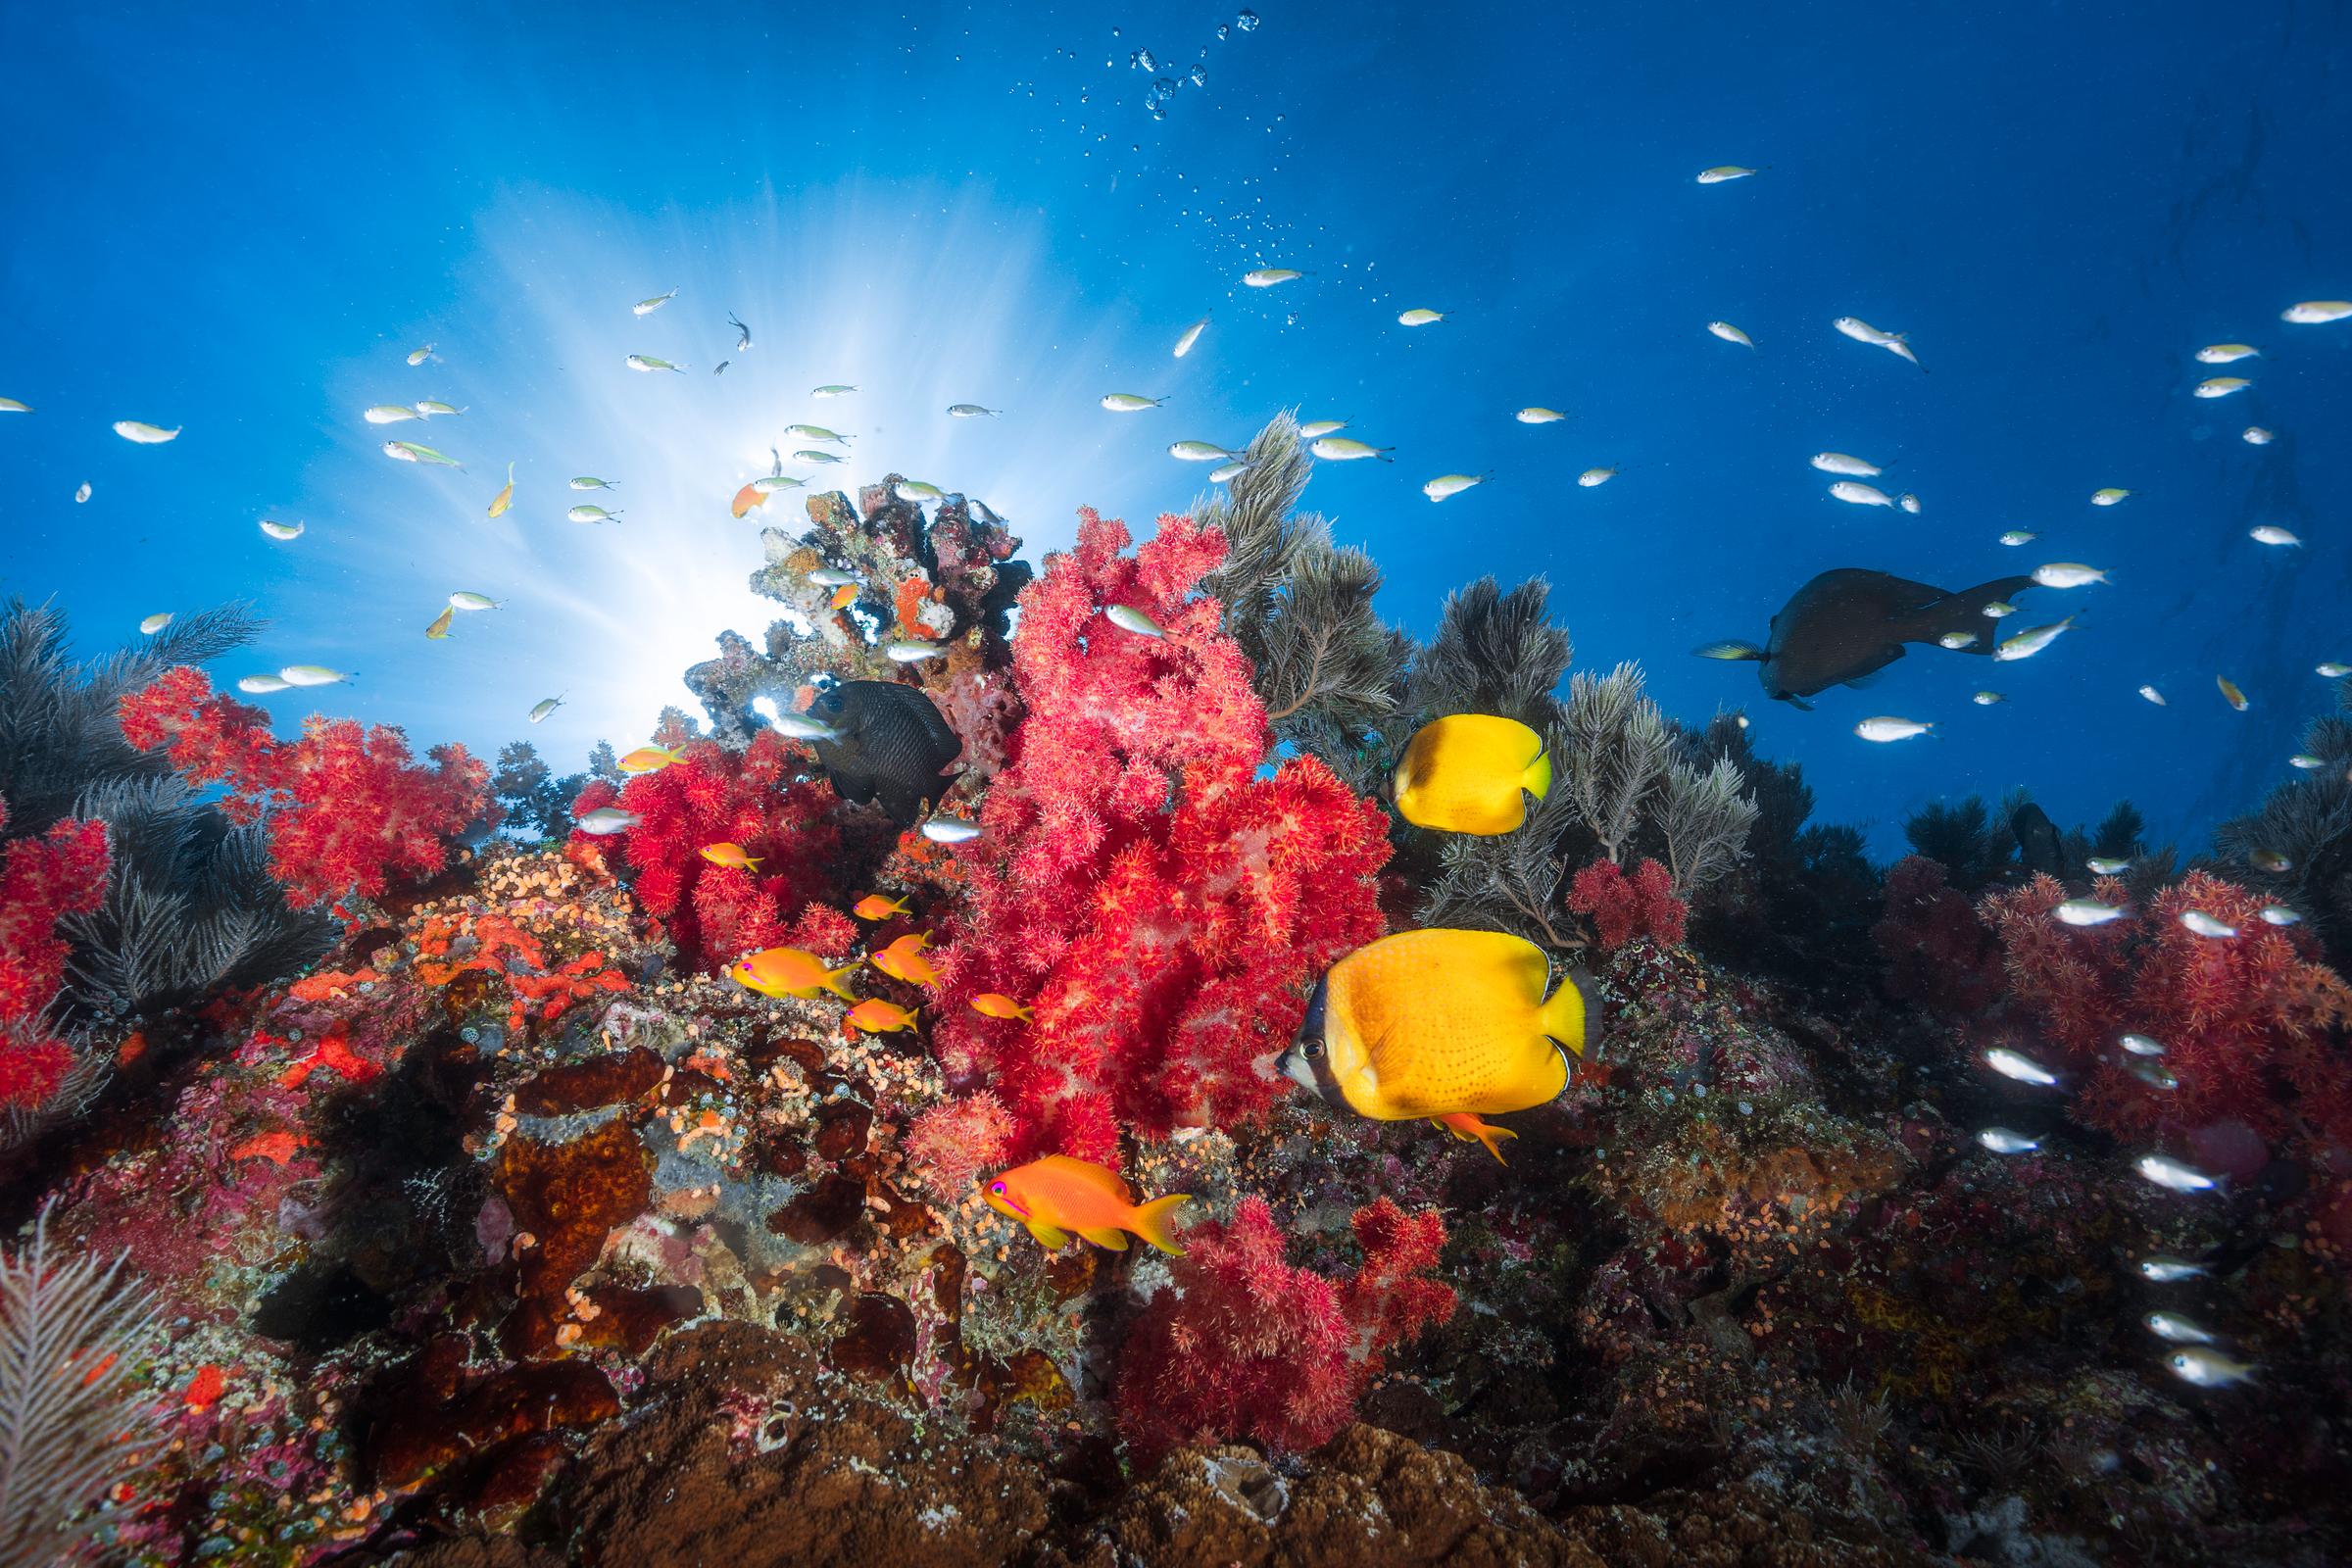
The composition of a photo in backlight: show the foreground well !
As said in the introduction, the sun should be considered as a subject in its own right. Its position in your composition is just as important.
It is sometimes difficult to find the right placement, especially since there are many natural obstacles preventing us from positioning ourselves as we please.
To do this, ultra wide angle lenses will be more than necessary.
I’m thinking of course of fisheyes, or short focal lengths like 16 mm, see even more wild!!
It will take imagination to find a good composition.
- Placement of the sun in relation to the subject of the foreground must be consistent
- The reading of the image must naturally lead us from the subject to the sun.
Or like this :
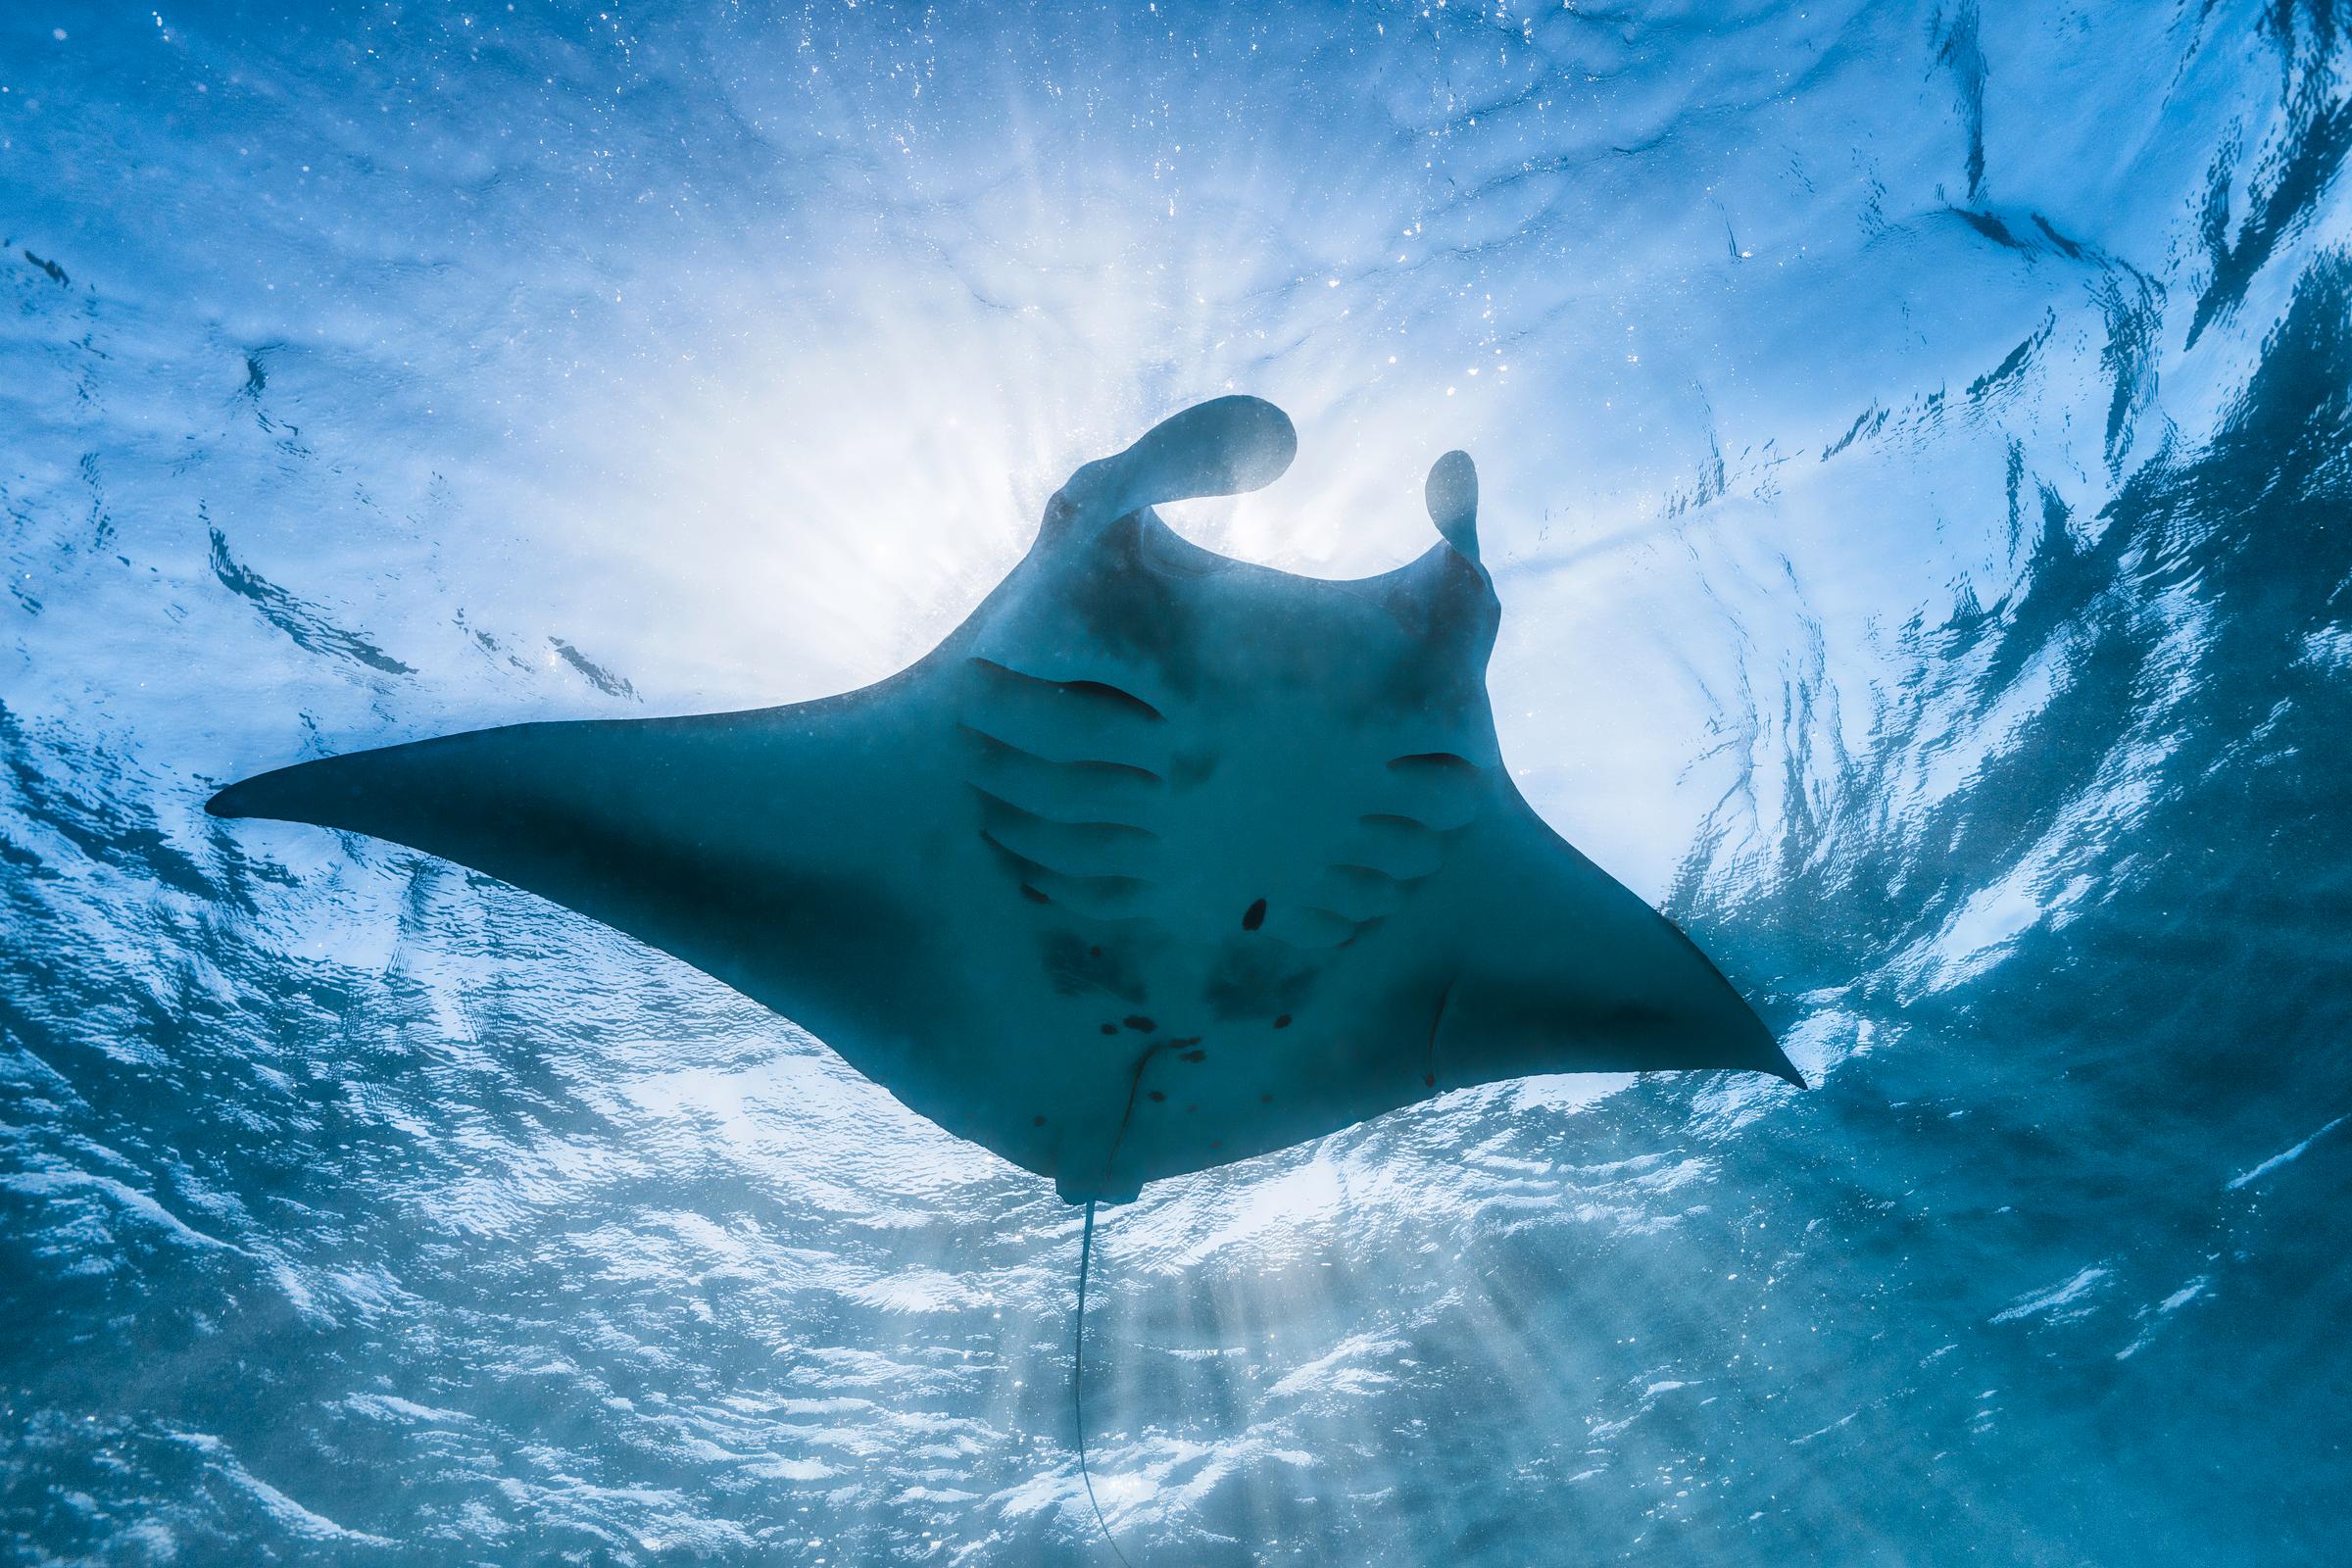
A moving subject can do the trick like this manta ray photographed without flash :
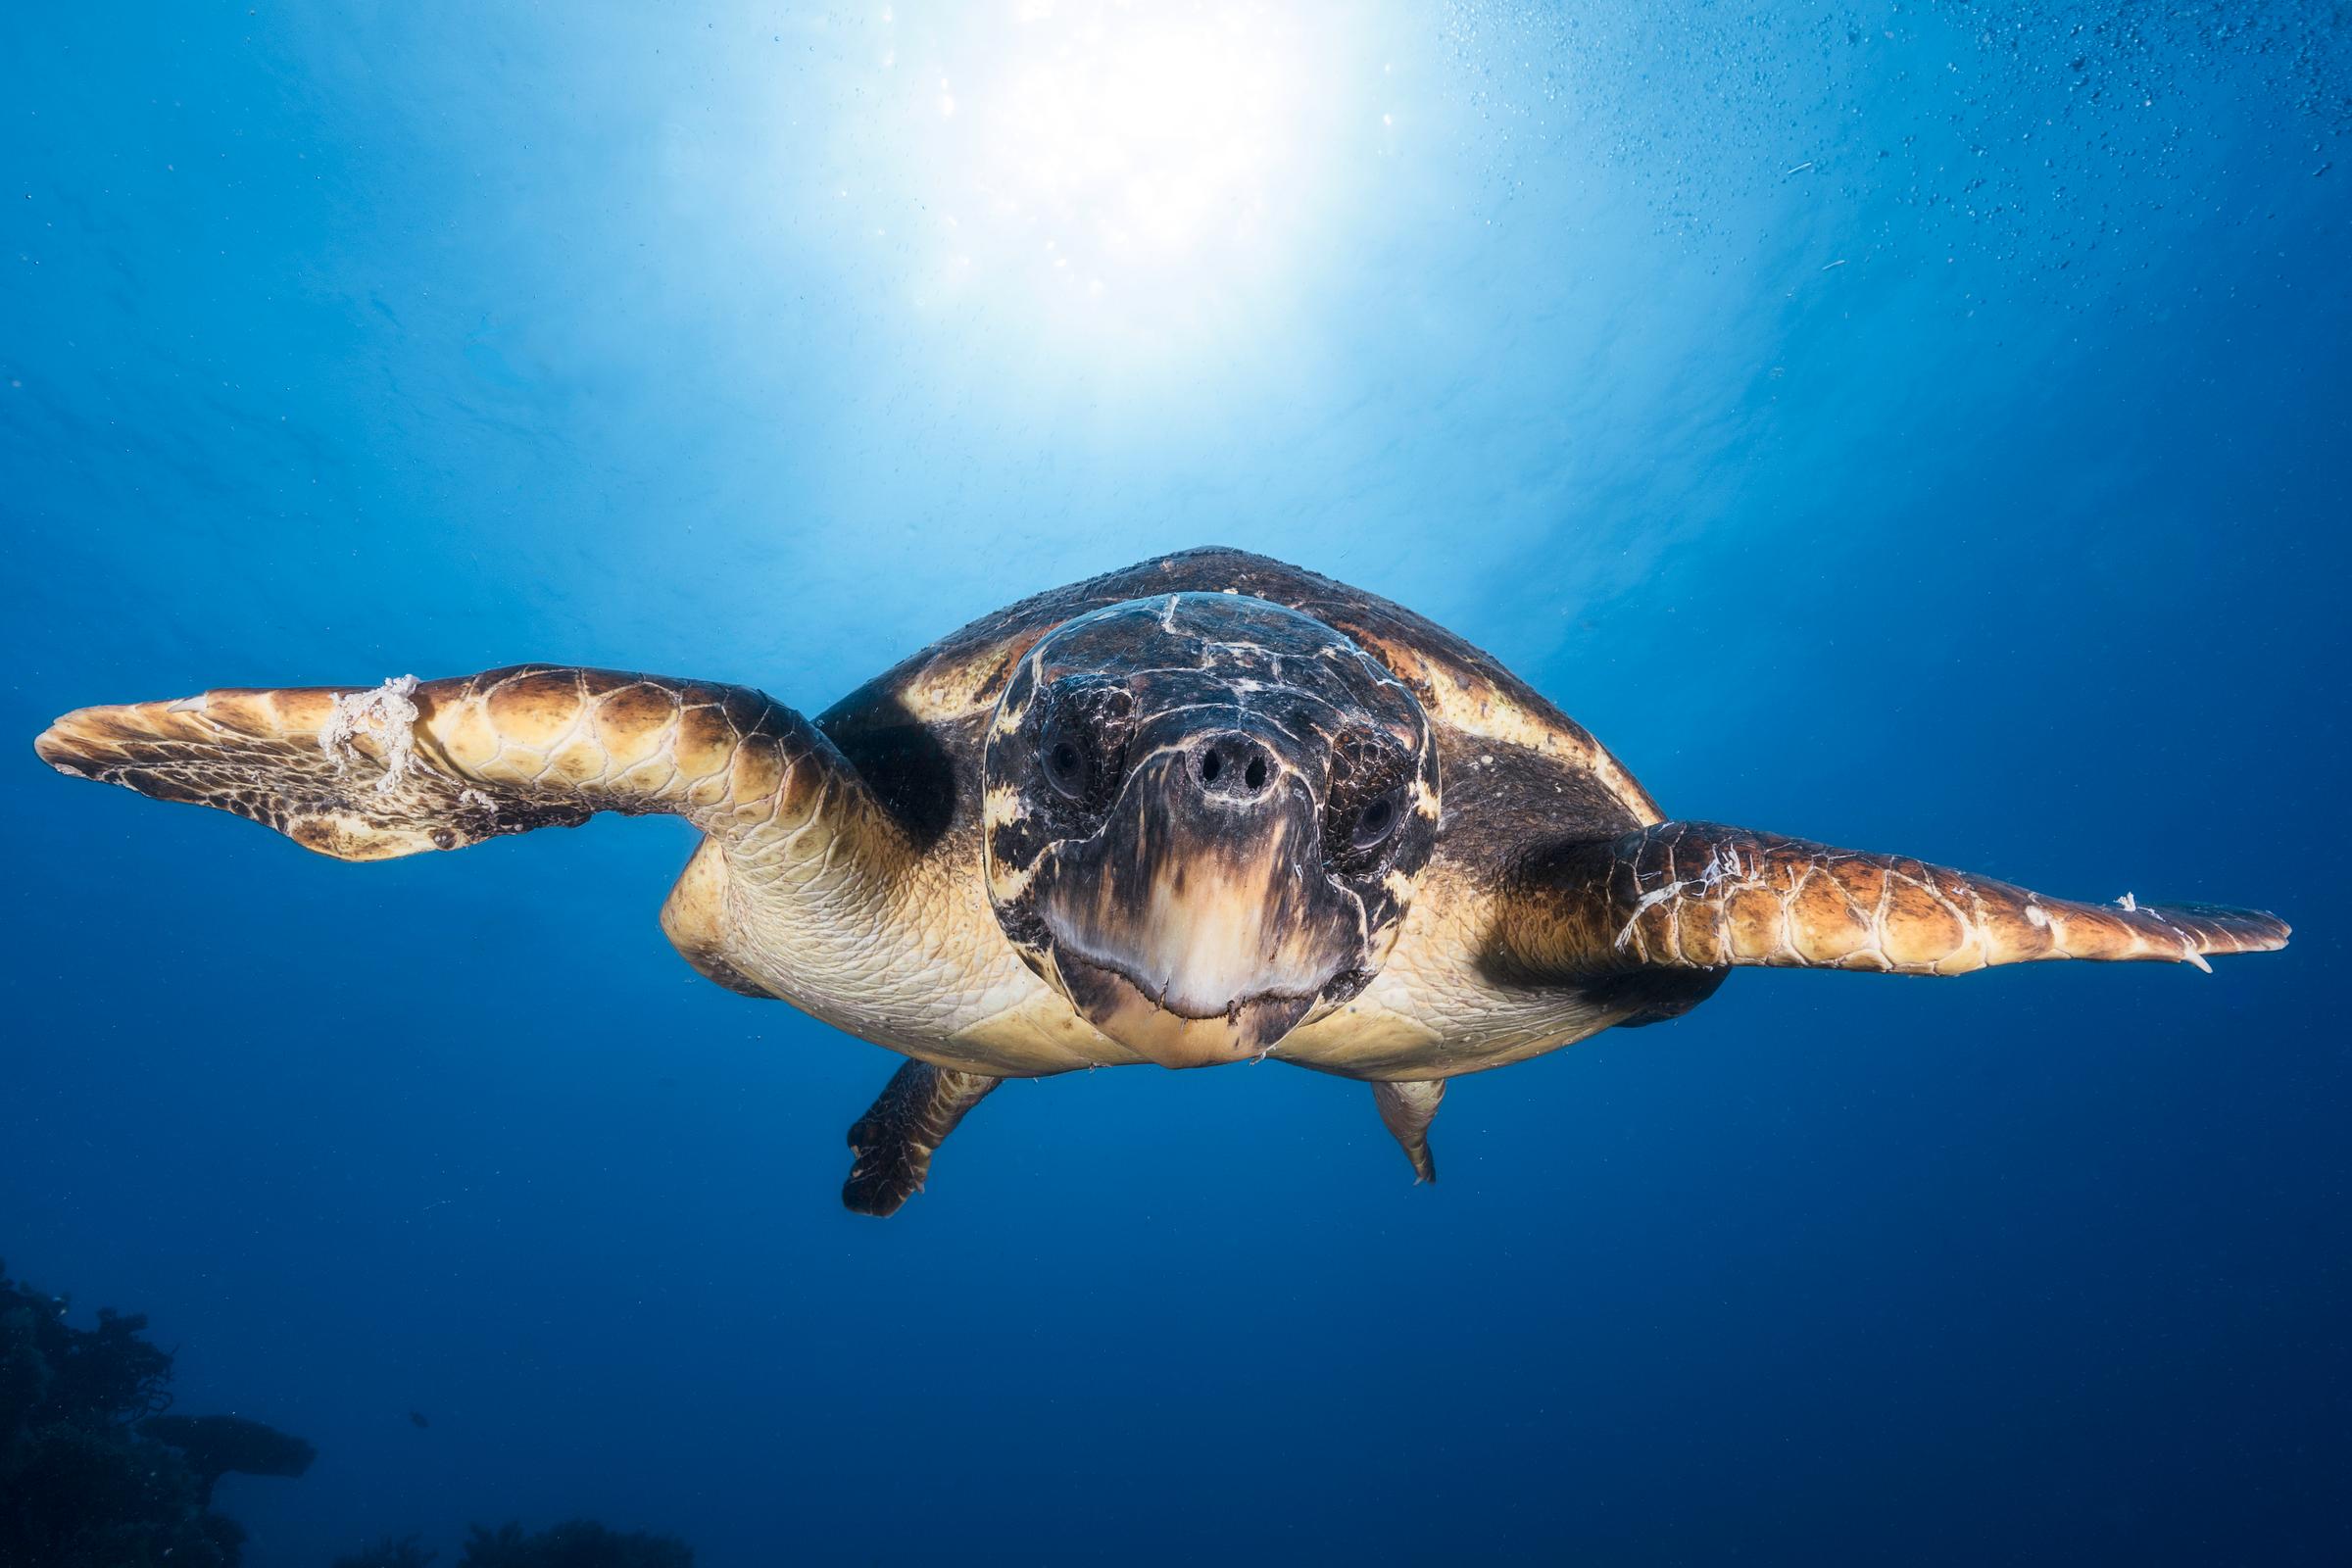
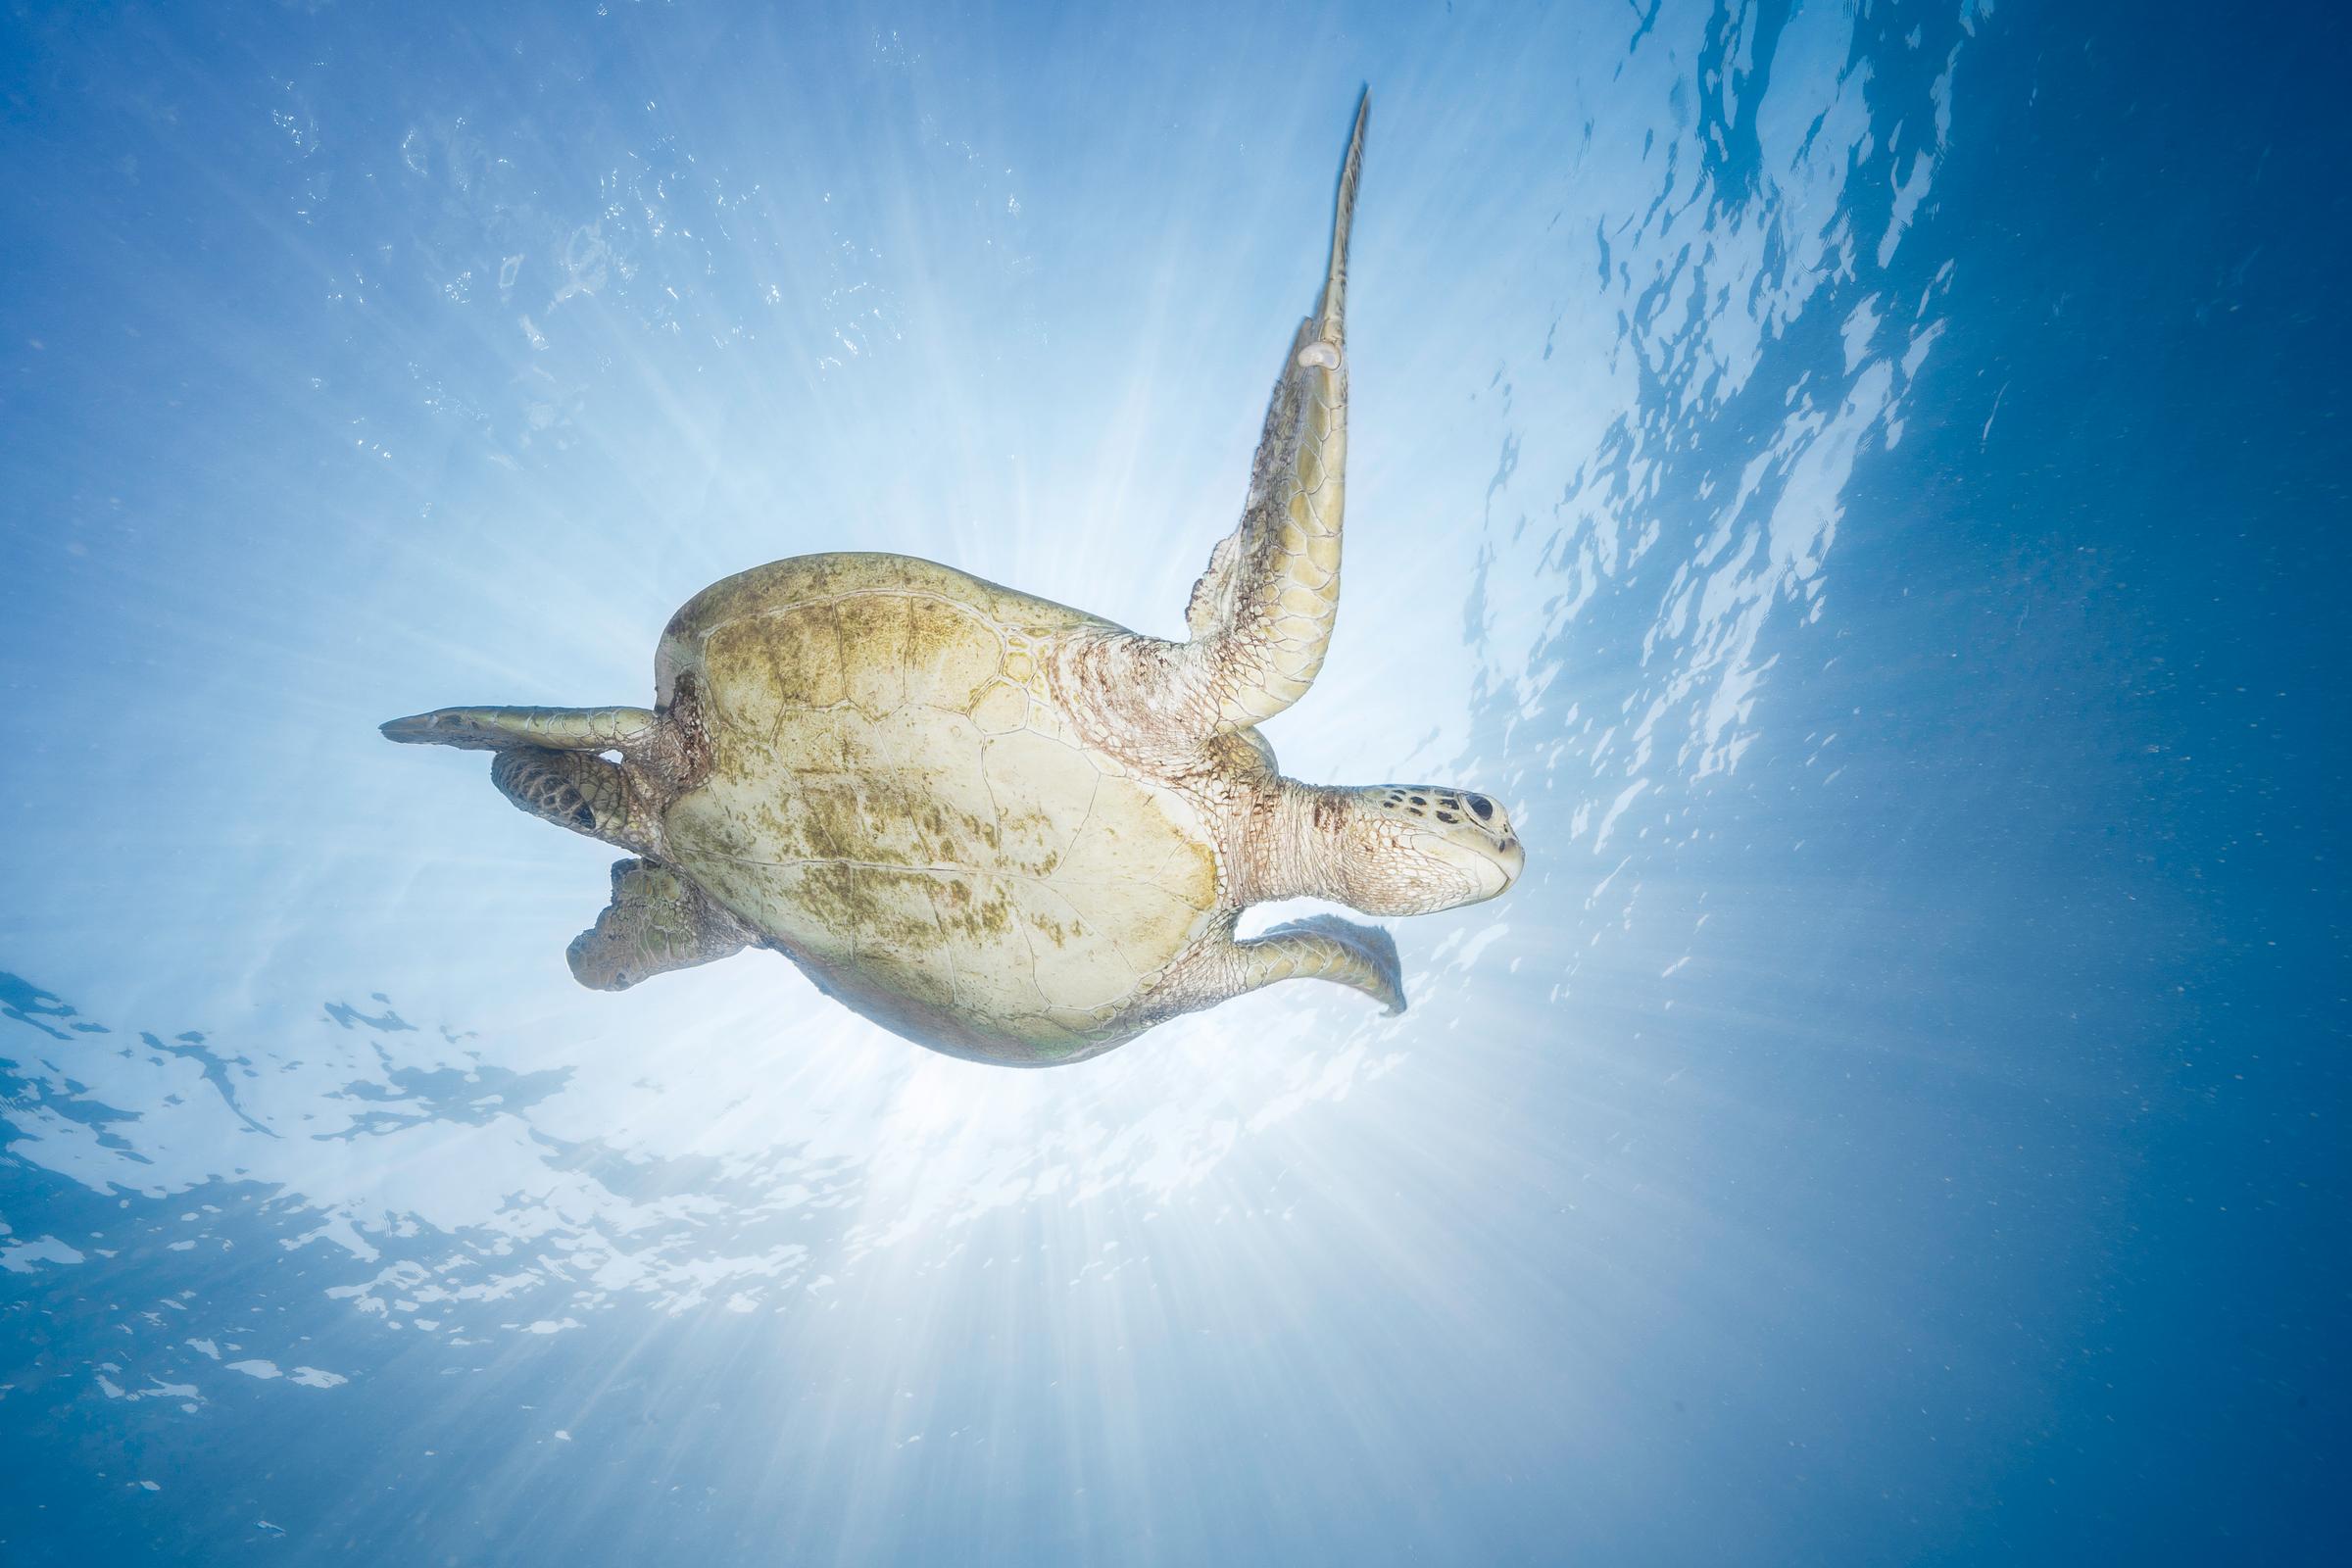
Or this green turtle as an anti “burnt sun” pellet :
The different renderings of the sun in underwater photography :

The rendering of the sun varies according to a multitude of natural factors that cannot be controlled.
It is therefore necessary to judge these conditions to know whether or not a backlight photograph is possible during the dive.
If some of these conditions are met, do not hesitate to take advantage of them and anticipate future shots.
Let’s recap the 5 keys to taking a great backlit picture :
To be successful, a photo in the daylight must:
- be under exposed
- have a clean Dome/tube
- have a good orientation of its flashes
- be well composed
- to have a sharp lens
The look of the sun varies according to many factors
Here is a non-exhaustive list:
- depth
- Visibility
- cloud cover
- the time
- inclination
- the lens
- the setting
- post-processing
As you understood, there are a multitude of factors that influence the appearance of the sun.
Keep in mind that in pictures, the most important things are not the difficulties imposed but rather the possibilities that allow us to make the most of the present moment. A good technical knowledge is essential for this.
However… that’s not enough, you also need a bit of experience (which translates into the number of right-clicks + trashcan of each one).
And yes, we’ve all been there at some point. The best learning is practice.
It is the field experience that will allow you to assess the situation and make the right choices at the right time. .

Christian Duchambon
Tout d'abord merci pour ces tutos très instructifs et très bien fait.
J'aimerai savoir qu'elle devrait être la position des flashs pour executer une photo face au soleil, et leur puissance .
Merci